How To Build A Flat Roof Truss
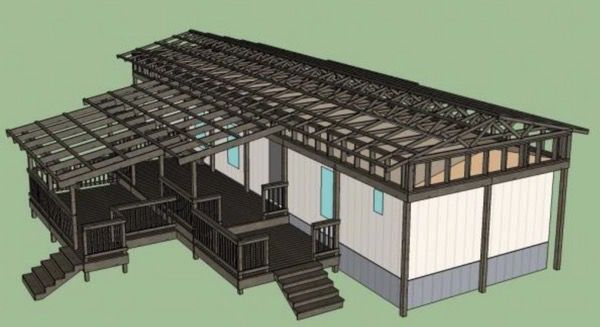
The Best Self Supported Mobile Home Roof Over Designs
Scissor Truss Designs Truss Designs

Top 9 Most Popular Build Truss List And Get Free Shipping 8bi5inni
Scissor Truss Designs Truss Designs

The Best Self Supported Mobile Home Roof Over Designs

Building Our Modern Treehouse Slanted Roof Merrypad

Start your brace by constructing a square of timber along the top of the outside walls and then building your first support from this.
How to build a flat roof truss - A wooden roof truss is a prefab triangular frame that replaces one set of rafters and a joist in traditional stick framing. Then carefully return the piece to its place in the assembly. Leslie althoff created date. Purchase your materials including prefabricated trusses plywood covering and roof tiles.
For additional stability you can also use steel joists that are built into one or both of the walls. Hip truss systems are very popular throughout the country. The flat portion is increased the nearer the truss is to the end wall. Next measure the area and make calculations so you know how much of your chosen materials to buy.
To frame this style roof hip trusses are utilized from the main peak of the building stepping down with a flat top chord. Cut in half with one beam slightly lower than the other. Build your own roof trusses the very first step for building roof trusses is to prepare a design layout that can be sketched by a professional architect or can also be done by using a software that is specifically meant to design a roof truss. The second step in building a roof truss is to prepare the materials needed.
Once the square of timber has been created cut two pieces of 2 x 4 so that they incline towards each other. Roof truss span chart author. Two upper cords that make up the peak one lower cord that runs horizontally along the bottom of the triangle and a vertical king post support that runs up through the center. Add a beam between these two slopes.
Use construction adhesive to hold the truss components together. In this design each side of the building has a roof pitch and eave. Flat the most economical flat truss for a roof is provided when the depth of the truss in inches is approximately equal to 7 of the span in inches. To build a roof start by deciding whether you want to put up a flat or pitched roof on your building.
Apply a generous amount of adhesive to the face of each piece where it will intersect with the next using a putty knife. Lay pieces of plywood over each joint covering about a foot 30 cm of each truss member s length. Glue the plywood to the joint and then nail it to each member to fully secure it. Press the 2 connecting pieces together for 30 40 seconds to ensure that the adhesive sticks firmly.
Repeat this process on the reverse side of the truss.

David Chola Architect Conte 4 Bedroom House Design

Construction Concerns Trusses Revisited Fire Engineering

David Chola Architect Conte 4 Bedroom House Design

Tiny Rita Tiny Mum Houses

Tiny Rita Tiny Mum Houses
.jpg?1500564698)
Cultural Innovation Store In The Jiangning Imperial Silk Manufacturing Museum Fanaf Archdaily

Kikutake S Sky House Where Metabolism Le Corbusier Meet Archdaily

The Best Self Supported Mobile Home Roof Over Designs
Winter Is Coming A Message Of Warning And Constant Vigilance How To Avoid Or Reduce Property Damage During Stormy Winter Weather

Regent S Park Loft Is A Minimal Monochrome Apartment By Originate
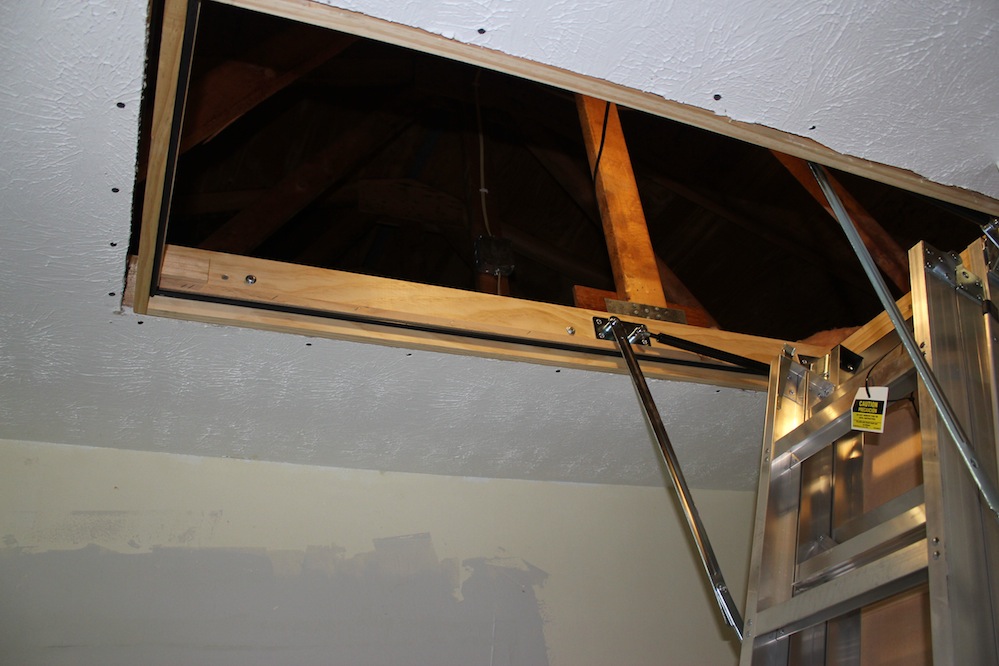
Attic Ladder Installation Step By Step With Photos
Scissor Truss Designs Truss Designs

10 Projects That Feature Striking Steel Trusses Archdaily

The Rock Atelier General Archdaily
.jpg?1500562578)
