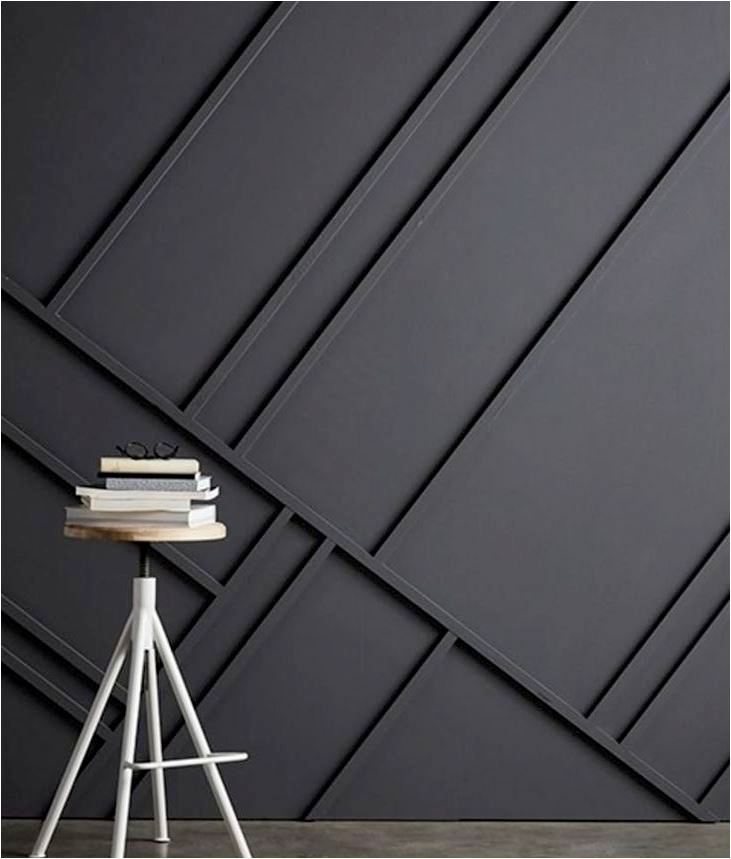
How To Install Tongue And Groove Ceiling Tiles

Top 10 Most Popular Ceiling Tile Ideas And Get Free Shipping 9lf4ec20

Top 10 Largest Wallpaper Ceiling List And Get Free Shipping 94b4dhe6

Top 8 Most Popular Pvc Panel Ceiling Wall Ideas And Get Free Shipping 576eik7k

Top 10 Most Popular Ceiling Tile Paper List And Get Free Shipping A638

Top 10 Most Popular Ceiling Tile Paper List And Get Free Shipping A638

Top 10 Most Popular Ceiling Tile Ideas And Get Free Shipping 9lf4ec20
For more info or to purchase the decorative ceiling tiles in this video click here.
How to install tongue and groove ceiling tiles - For the next piece you will connect the groove of the new piece into the tongue of the first piece. As before set the tiles to that the tongue and groove tiles can be put together. If your ceiling is in good shape you can install tiles by applying adhesive to them and pressing them against the ceiling starting in the center of the room and working outward. 2 you have to seat the tongues and grooves together and they don t always want to marry.
3 tongue and groove isn t always flat so you have to force the boards together to get them seated. Ceiling tiles come in a wide range of styles and frequently have easy to connect tongue and groove style seams. Tongue and groove ceiling installation. If you are installing directly to ceiling joists or an unsound ceiling first attach furring strips.
These mdf medium density fiber board tongue and groove planks are installed over furring strips with what comes in the box with easy up tracks and clips or with easy up clips over an existing 15 16 grid. Use the lines as a guide to install the tiles. For the initial cuts remove the side that is devoid of a wide stapling brim. Follow the first part of the directions to install a tongue and groove ceiling in your home.
Installing tongue and groove walls can be a real workout. Use the framing gun to add a nail to the tongue of the plank and secure in place. Groove facing the wall tongue facing out. Begin by applying border tiles then fill the space with full size tiles.
With the correct tools tongue and groove style ceiling tiles can be easily put up on your own. Start with your first piece. To move ahead to part 2 click here step 1 measure the ceiling area to purchase supply quantities needed. 1 you re usually working over your head.

Carpet Stores Grapevine Texas

Top 8 Most Popular Pvc Panel Ceiling Wall Ideas And Get Free Shipping 576eik7k

Writer S House Branch Studio Architects Archdaily

Coastal Cottage Vibe Inspires Lu Design Build Kitchen Renovation In Chesterfield Home Laduenews Com

Best Top 10 Pvc Wall Ceilings Tiles Ideas And Get Free Shipping 3dkmhli5

Top 10 Plastic Shower Wall Panels Brands And Get Free Shipping A243

Top 8 Most Popular Plain Aluminium Ceiling Brands And Get Free Shipping 1hna9n6k

8 Diy Projects To Spice Up Your Ceilings Knockoffdecor Com

Best Pvc Ceiling Boards List And Get Free Shipping 029mkh43

Best Pvc Ceiling 26 Wall Panel List And Get Free Shipping 65l1dn9i

Best Top Boards For Ceiling List And Get Free Shipping L4he5180

Best Top Fibrous Plasterboard Ceiling Brands And Get Free Shipping Jf8dbfhi
Alternatives To White Shiplap Centsational Style
Dark Plywood Built Ins Define Japanese Home Designs Ideas On Dornob

